
Виявлення типових проблем з гайковим ключем-вертю
Зсування або нестабільне вертання
Поширеною проблемою ключів-рутинок є їхнє проковзування під час використання, яке зазвичай виникає через знос пазів або зубців храпового механізму з часом. Цей знос впливає на кількість переданого крутного моменту. Після кількох місяців регулярного використання ці деталі природним чином зношуються. Щоб перевірити, чи проковзує ваш ключ, спробуйте міцно утримувати його, обертаючи ручку. Якщо він обертається вільно, навіть якщо нічого не повинно рухатися, це ознака того, що щось не в порядку. Коли це трапляється, роботу доводиться постійно переривати, а ще гірше — завдання взагалі не виконуються, і проекти починають відставати від графіка. Кожен, хто покладається на свої інструменти, знає, що швидке вирішення такого роду проблеми робить усе різницею між якісним виконанням справ та непотрібними затримками.
Захоплення або застрягання головки верtanя
Коли ключ-тріскачка застрягає, це зазвичай відбувається через накопичення бруду всередині або утворення іржі на компонентах, що заважає нормальній роботі інструменту. Якщо ви підозрюєте, що рухома частина не працює належним чином, спочатку обережно пошарудіть нею. Іноді достатньо просто струсити забруднення. У протилежному випадку нанесіть деякий засіб для очищення навколо механізму, щоб допомогти звільнити застряглі частини. Для перевірки фахівці часто тестують роботу тріскачок у різних умовах або розпилюють мастило на з'єднання, щоб побачити, чи поліпшиться рух. Майстерні, що займаються ручним інструментом, стверджують, що серед обсягу ремонтних робіт часто трапляються саме тріскачки. Саме тому більшість досвідчених техніків рекомендують регулярно обслуговувати ці інструменти, очищуючи їх і змащуючи. Невеличка профілактична підтримка значно зменшить кількість неприємних моментів, коли інструмент раптово виходить з ладу в критичний момент роботи.
Нев尋альний шум під час використання
Коли ключ-рутавий починає виходити дивні звуки, такі як скрегіт або клацання під час використання, це зазвичай означає, що щось не так усередині. Найчастіше, ці шуми вказують на нестачу належного змащення десь у механізмі. Щоб з'ясувати, що відбувається, уважно огляньте всі компоненти на наявність ознак зносу з часом. Переконайтеся, що кожна рухома частина регулярно отримує достатню кількість олії або мастила. Майстри, які працюють з цими інструментами з ранку до вечора, знають, що навіть незначні дивинки у звуках можуть насправді сигналізувати про більші проблеми, які чекають, якщо їх ігнорувати. Вчасне вирішення цих дрібних попереджувальних сигналів допомагає зберігати дорогі інструменти працездатними довше без поломок. Наступного разу, коли хтось скаржитиметься, що їхній ключ зламався, пам’ятайте, що уважне слухання може заощадити як кошти, так і нерви в майбутньому.
Крок-за-кроком розбірка та перевірка
Необхідні інструменти для безпечного демонтажу
Розбирання ключа-тріщотки вимагає наявності належного інструменту, якщо хтось хоче уникнути розчарування та можливого травмування. Більшість людей вважають, що їм потрібен добрий набір викруток, особливо хрестоподібна #2, оскільки вона сумісна з багатьма кріпленнями. Круглогубці стануть у нагоді, коли доведеться мати справу з тими непомітними дрібними деталями, а шестигранні ключі є майже обов’язковими для відкручування всіх цих болтів. Безпека завжди має бути на першому місці, тому варто вдягати рукавички, щоб захистити руки від гострих країв, а також захисні окуляри, щоб уберегтися від раптово відлітаючих уламків під час розбирання. Багато досвідчених механіків присягаються на магнітних лотках, щоб не загубити всі ці дрібні частинки, які схильні зникати. Ці прості запобіжні заходи роблять увесь процес більш плавним і зрештою економлять час, адже нікому не доведеться шукати втрачені деталі або займатися виправленням пошкоджених компонентів наостанок.
Розбирання механізму гайковерта
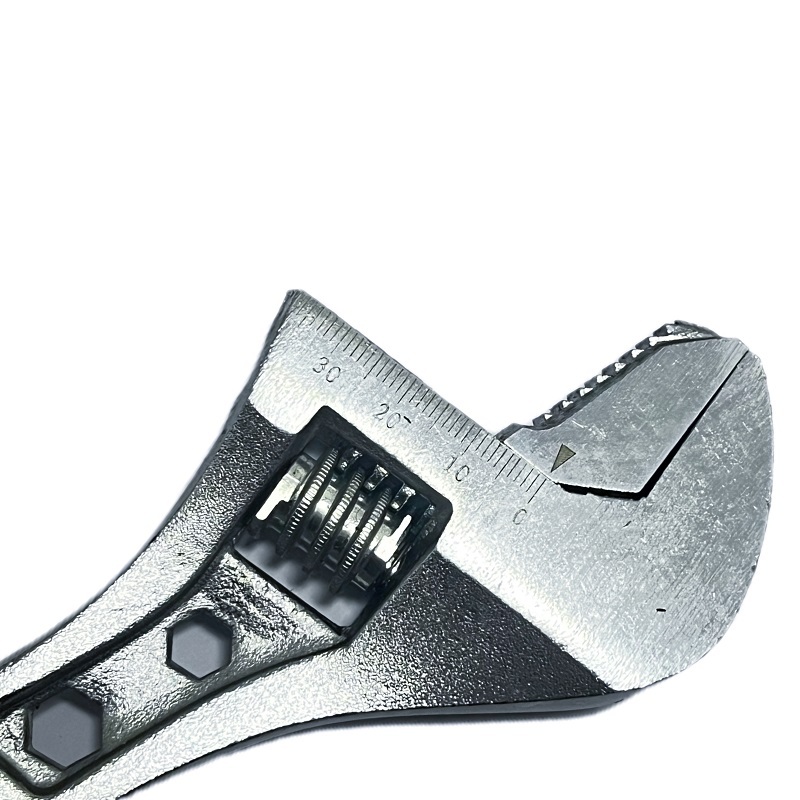
Розбирання механізму тріщотки потребує уважного ставлення, щоб усі частини перевірили на наявність пошкоджень або зносу. Спочатку міцно візьміться за ручку, перш ніж викручувати ті зовнішні кріплення корпусу. Як тільки гвинти вийняті, обережно розділіть дві половинки корпусу, щоб відкрити внутрішню частину. Зверніть особливу увагу на храпову шестірню та зубці, адже саме вони забезпечують належне функціонування тріщотки. Під час огляду стежте за підозрілими місцями, такими як поламані зубці або ділянки, де метал значно зношений. Ці проблеми можуть серйозно вплинути на ефективність роботи інструменту. Зараз я детально пройдуся цим процесом крок за кроком.
- Закріпіть гайковий ключ у струбці, щоб стабілізувати його під час розбирання.
- Використовуйте відрізнювач крижком №2, щоб викрутили та вийняти пластику основи ручки.
- Осторожно розділіть корпус, щоб відкрити внутрішній механізм щипця.
- Перевірте зубці і клачки на зношування, ржавчину чи пошкодження.
- Очищіть всі компоненти щеткою та легким смазувальним матеріалом, щоб перевірити наявність прихованих дефектів.
Виконання цих кроків забезпечує дотримання глибокої перевірки, зберігаючи ключ у оптимальному робочому стані.
Найкращі практики чищення та смазування
Вилучення сміття з внутрішніх компонентів
Підтримання чистоти внутрішніх частин ключів-тріщоток має велике значення, якщо ми хочемо, щоб вони працювали належним чином і довше служили до виходу з ладу. Накопичення бруду всередині може порушити рух частин під час затягування або ослаблення болтів. Під час очищення цих інструментів більшість механіків запевняє, що певні засоби та методи справді добре виконують роботу. Зазвичай люди вдаються до використання м’яких розчинників разом із м’якою щіткою, щоб прибрати забруднення, не подряпавши важливі частини. На моїй практиці роботи з інструментами я помітив, що дотримання рекомендацій професіоналів має велике значення для підтримання бездоганної роботи тріщоток. Багато досвідчених техніків радять видалити стійкі частинки пилу та залишки бруду за допомогою стисненого повітря. Цей додатковий крок дозволяє дістатися до важкодоступних місць, куди звичайне чистіння щіткою не потрапляє, забезпечуючи тим самим, щоб нічого не забило механізм у подальшій роботі.
Вибір правильного смазувальних матеріалів (прозорість ремонту динамометричного ключа)
Вибір правильного мастила для ключів-тріщоток має велике значення для тривалості їхнього використання та ефективності роботи. Якісне мастило виконує кілька завдань одночасно: зменшує тертя між рухомими частинами та запобігає утворенню іржі з часом. Більшість майстрів, з якими я розмовляв, радять використовувати синтетичне мастило для цих інструментів, тому що воно краще розтікається і не так швидко втрачає свої властивості, як інші види. Серед основних характеристик, що впливають на якість мастила, варто виокремити його густоту (вязкість) та стійкість до перепадів температури. Інструменти, які регулярно обслуговують і змащують, зазвичай служать у два рази довше, ніж ті, якими нехтують. Саме тому власники майстерень завжди наголошують на важливості дотримання графіка технічного обслуговування та придбання якісних матеріалів замість пошуку дешевших альтернатив для чогось такого важливого, як догляд за інструментами.
Ремонт та заміна витріченних компонентів
Виправлення пошкоджених павідок або пружин
Усунення проблем з храповим ключем зазвичай починається з виявлення зношених частин, таких як храпові колеса та пружини. Звертайте увагу на те, коли ключ проковзує під час використання, рухається нерівномірно або зовсім застрягає. Більшість людей вирішують ці проблеми, замінюючи несправні частини, замість того, щоб вдаватися до складних ремонтів. Обережно зніміть старі храпові колеса або пружини та встановіть нові відповідно до вказівок виробника в технічній документації. Посібники з ремонту з ілюстраціями надзвичайно корисні для правильної збірки всіх деталей. За даними, зібраними в майстернях Азії, приблизно 30% усіх ремонтів храпових ключів пов'язані з несправними храповими колесами та пружинами. Для підприємств, що мають справу з інструментами, виготовленими в таких місцях, як Тайвань, де важлива точність, підтримання справного стану цих внутрішніх компонентів — це не просто важливо, це основа тривалої та ефективної роботи дорогого обладнання.
Перебудова з правильними специфікаціями моменту сили
Правильне встановлення моменту затягування під час збирання забезпечує ефективність використання ключів-торцевих. Після завершення ремонту кожен елемент слід затягнути згідно з вказівками виробника. У противному випадку обладнання може працювати неналежним чином або згодом вийти з ладу. Добре рішення — періодично перевіряти значення моменту затягування за допомогою правильно відкаліброваного ключа. Дослідження також вказують на шокуючий факт: приблизно 25 відсотків невдалих ремонтів відбуваються через помилки під час збирання. Тож увага до деталей — це не просто дотримання правил; це допомагає зробити інструменти більш надійними, зменшуючи потребу в постійному ремонті та заміні.
Превентивне обслуговування для продовження строку служби
Регулярні графіки смазування
Правильне змащування ключів-тріскачок дозволяє їм служити значно довше, ніж це було б інакше. Коли металеві частини рухаються одна відносно одної без належного змащування, виникає тертя, яке з часом призводить до зносу компонентів. Добрею практикою для більшості майстерень є встановлення певного режиму технічного обслуговування, залежно від частоти використання. Інструменти, що використовуються щодня, як правило, потребують нанесення свіжого мастила принаймні один раз на тиждень, тоді як ті, що використовуються зрідка, можуть обійтися перевіркою один раз на місяць. Дослідження практик технічного обслуговування в майстернях показують, що інструменти, які регулярно обслуговуються, залишаються працездатними набагато довше, ніж очікувалося. Економія від уникнення витрат на передчасну заміну окремих інструментів сама по собі варта кількох додаткових хвилин, витрачених під час планового технічного обслуговування.
Перевірка наявності ранньої відмінності зносу
Регулярні перевірки на ознаки зносу дійсно вигідні на довгий строк, оскільки допомагають заощадити кошти на дорогих ремонтних роботах у майбутньому. Коли мова йде конкретно про ключі-тріщотки, уважно подивіться, наскільки плавно вони обертаються, і перевірте, чи немає пошкоджень на дрібних зубах (тріщотках) або на пружинах всередині. Доброю ідеєю буде відводити час один раз на місяць, щоб швидко оглянути їх, поки вони ще не почали зазнавати проблем. Майстри часто звертають увагу на такі ознаки, як вигнуті частини, дивні клацаючі звуки під час обертання або просто відчутно повільна робота, які сигналізують про можливу несправність. Дотримуйтеся цього режиму, і інструменти прослужать набагато довше, ніж очікувалося, продовжуючи надійно працювати день за днем.
Уникнення перетягування механізмів
Занадто великий крутний момент, прикладений до механізмів трещотки, може призвести до серйозних пошкджень, які зазвичай призводять до витрат на ремонт або заміну. У цьому випадку все вирішує дотримання рекомендацій виробників, адже правильні налаштування крутного моменту точно відповідають потребам різних застосувань. Візьміть, наприклад, делікатні деталі — правильне налаштування інструменту запобігає їхньому перевантаженню. Насправді існують досить прості способи уникнути перевищення крутного моменту. Використання якісного ключа-динамометра та ознайомлення з діаграмами виробника перед початком роботи значно допомагає уникнути проблем у майбутньому. Це підтверджують і виробничі специфікації, які показують, що правильне застосування крутного моменту — це не просто дотримання правил, а й справжній спосіб зберегти працездатність інструментів на довший термін без поломок. Ці базові заходи профілактики суттєво подовжують термін служби ключів-трещоток, економлячи і час, і гроші.